


Fixing Low Water Pressure in Your Sprinklers (Without Guessing)
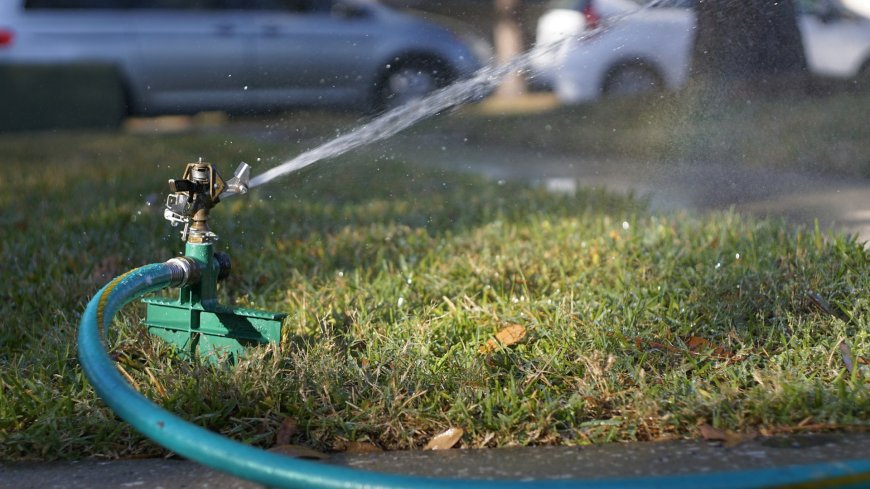
Low water pressure in your sprinkler system can turn a lush, green lawn into a patchwork of dry spots and stressed plants. When sprinkler heads produce weak sprays, fail to pop up, or barely cover their intended area, the problem often lies in the systems water pressure. While its tempting to guess at the cause, a systematic approach to diagnosing and fixing low water pressure can save you time, money, and frustration. In this article, well guide you through the common causes of low water pressure in sprinkler systems, provide a step-by-step process to identify the issue, and offer practical solutions to restore your systems performanceall without relying on guesswork.
Why Low Water Pressure Is a Problem
Low water pressure in a sprinkler system disrupts its ability to deliver water evenly and efficiently. This can lead to:
-
Uneven Watering: Some areas of your lawn or garden may receive too little water, causing dry patches or plant stress.
-
Wasted Water: Weak sprays or leaks can waste water, increasing your utility bill.
-
System Damage: Low pressure can strain components like valves and pumps, leading to premature wear.
-
Landscape Damage: Under-watered plants may die, while over-saturated areas from leaks can erode soil or promote mold.
By addressing low water pressure systematically, you can pinpoint the exact cause and apply the right fix, ensuring your sprinkler system operates at peak performance.
Common Causes of Low Water Pressure in Sprinkler Systems
Low water pressure can stem from issues at the water source, within the sprinkler system, or in specific components. Here are the most common culprits:
1. Partially Closed Main Water Valve or Backflow Preventer
The main water valve or backflow preventer controls water flow to the entire sprinkler system. If either is partially closed or obstructed, it can restrict water flow, reducing pressure to all zones.
Symptoms: Low pressure across all zones, weak spray from all heads, or reduced water flow even when the system is off.
2. Clogged Sprinkler Heads or Filters
Debris like dirt, sand, or grass can clog sprinkler heads or their internal filters, reducing water flow and pressure. This is often a localized issue affecting specific heads or zones.
Symptoms: Weak or uneven spray from certain heads, heads that dont pop up fully, or visible debris around the head.
3. Underground Pipe Leaks or Breaks
A leak or break in the underground pipes can significantly reduce water pressure by allowing water to escape before it reaches the sprinkler heads. Leaks are often caused by tree roots, freezing, or accidental damage during yard work.
Symptoms: Soggy or muddy areas in the yard, sinkholes, hissing sounds, or low pressure in one or more zones.
4. Faulty or Dirty Zone Valves
Zone valves control water flow to specific sections of the sprinkler system. If a valve is clogged, damaged, or not opening fully, it can restrict water flow to the heads in that zone.
Symptoms: Low pressure in one zone but normal pressure in others, or a valve that doesnt activate properly.
5. Insufficient Water Supply or Pump Issues
If your homes water supply or irrigation pump cant deliver enough pressure or flow, the sprinkler system will struggle to operate effectively. This is common in systems with too many heads per zone or an undersized water line.
Symptoms: Consistently low pressure across all zones, especially during peak water usage times (e.g., when household appliances are running).
6. Incorrect Sprinkler Head Design or Installation
Using mismatched sprinkler heads or designing a zone with too many heads can overwhelm the systems pressure capacity, leading to weak performance.
Symptoms: Uneven spray patterns, some heads working better than others, or heads that require higher pressure than the system can provide.
7. Pressure Regulator Issues
Some sprinkler systems use a pressure regulator to maintain consistent water pressure. If the regulator is malfunctioning or set too low, it can restrict flow to the system.
Symptoms: Uniformly low pressure across all zones, or a regulator thats visibly damaged or misadjusted.
Step-by-Step Process to Diagnose and Fix Low Water Pressure
To fix low water pressure without guessing, follow this systematic approach to identify and resolve the issue:
Step 1: Check the Main Water Supply
The first step is to ensure the water supply to the sprinkler system is adequate.
-
Action: Locate the main water valve and backflow preventer (usually near your water meter or where the irrigation system connects to the main line). Verify that both are fully open.
-
Test: Measure water pressure at an outdoor faucet using a pressure gauge (available at hardware stores). Most sprinkler systems require 3050 PSI for optimal performance.
-
Fix: If the valve or backflow preventer is partially closed, open it fully. If pressure at the faucet is below 30 PSI, contact your water utility provider or a plumber to investigate low supply pressure.
Step 2: Inspect Sprinkler Heads and Filters
Clogged heads or filters are a common cause of localized low pressure.
-
Action: Run each zone individually and observe the performance of each sprinkler head. Look for weak sprays, heads that dont pop up, or irregular patterns.
-
Test: Unscrew the affected heads and check their filters and nozzles for debris.
-
Fix: Rinse filters and nozzles under clean water, clearing blockages with a small wire or pin. Replace damaged heads with the same model to ensure compatibility. Test the zone again to confirm improved pressure.
Step 3: Look for Underground Leaks
Leaks can drastically reduce pressure and are often harder to detect because theyre underground.
-
Action: Walk your yard, looking for soggy spots, pooling water, sinkholes, or eroded soil along the path of the sprinkler pipes. Listen for hissing or gurgling sounds when the system is running.
-
Test: Check your water meter when the sprinkler system is off. If the meter is still running, a leak is likely.
-
Fix: Mark suspected leak areas and turn off the water supply. For small leaks, you may be able to dig and repair the pipe using a pipe cutter and coupling. For larger or hard-to-locate leaks, hire a professional with leak detection equipment.
Step 4: Inspect Zone Valves
A faulty zone valve can cause low pressure in a single zone.
-
Action: Locate the valve box for the affected zone (usually buried in the yard). Inspect the valve and solenoid for debris, damage, or loose wiring.
-
Test: Manually activate the valve by turning the solenoid a quarter turn counterclockwise. If the zone turns on with good pressure, the issue may be electrical or in the controller.
-
Fix: Clean the valve diaphragm and remove any debris. Replace a damaged diaphragm or solenoid. If the valve is old or heavily corroded, replace it entirely.
Step 5: Evaluate System Design
An improperly designed system can cause pressure issues, especially if too many heads are on one zone.
-
Action: Count the number of heads in the affected zone and check their types (e.g., spray, rotor). Compare their flow requirements (in gallons per minute, or GPM) to your systems capacity, which is listed in the systems manual or on the manufacturers website.
-
Test: Run the zone and note if some heads perform better than others, indicating a design mismatch.
-
Fix: Reduce the number of heads per zone by splitting it into two zones, or replace high-flow heads with low-flow models. Consult an irrigation professional to redesign the zone if needed.
Step 6: Check the Pressure Regulator
If your system has a pressure regulator, ensure its functioning and set correctly.
-
Action: Locate the pressure regulator (often near the backflow preventer or main valve). Check for visible damage or leaks.
-
Test: Use a pressure gauge downstream of the regulator to measure output pressure. Compare it to the recommended pressure for your sprinkler heads.
-
Fix: Adjust the regulator to the correct pressure (typically 3050 PSI) using a screwdriver, if adjustable. Replace a faulty regulator with a new one compatible with your system.
Step 7: Test the Controller and Electrical Components
For automated systems, electrical issues can mimic low pressure problems by preventing valves from opening fully.
-
Action: Check the irrigation controller for error codes or programming issues. Inspect wiring to the zone valves for corrosion or loose connections.
-
Test: Use a multimeter to verify voltage (typically 24V AC) at the valve solenoid when the zone is activated.
-
Fix: Tighten loose connections, clean corroded terminals, or replace damaged wiring. If the controller is malfunctioning, consider upgrading to a modern model.
Step 8: Verify Pump Performance (If Applicable)
If your system uses a pump (common for well or lake water sources), low pressure could indicate pump issues.
-
Action: Check the pump for unusual noises, vibrations, or leaks. Verify that its running when the system is on.
-
Test: Measure pressure at the pump outlet using a gauge. Compare it to the pumps specifications.
-
Fix: Clean or replace the pumps intake screen if clogged. For persistent issues, contact a pump specialist for repair or replacement.
Tools Youll Need
To diagnose and fix low water pressure, gather these tools:
-
Pressure gauge (for measuring water pressure).
-
Multimeter (for testing electrical components).
-
Screwdriver (for opening valves and controllers).
-
Wire brush or sandpaper (for cleaning corroded connections).
-
Waterproof wire connectors (for repairing underground wires).
-
Pipe cutter and couplings (for fixing leaks).
-
Replacement sprinkler heads, valves, or diaphragms (as needed).
Preventing Future Low Pressure Issues
Once youve restored water pressure, take these steps to prevent future problems:
-
Regular Maintenance: Inspect and clean sprinkler heads, filters, and valves annually.
-
Winterize the System: In cold climates, drain the system before winter to prevent pipe damage.
-
Monitor Water Pressure: Install a pressure regulator if one isnt present to protect the system from high pressure.
-
Avoid Physical Damage: Mark pipe and head locations to prevent damage during yard work.
-
Upgrade Aging Systems: Replace old pipes, valves, or controllers with modern, durable components.
When to Call a Professional
Some low pressure issues require specialized expertise or equipment. Contact an irrigation professional if you encounter:
-
Underground leaks that are hard to locate or repair.
-
Persistent low pressure despite checking all components.
-
Electrical issues with the controller or valves.
-
Major system redesign or pump repairs.
Professionals can use tools like acoustic leak detectors, pipe locators, and advanced pressure testers to diagnose and fix complex issues efficiently.
Conclusion
Low water pressure in your sprinkler system can be frustrating, but by following a systematic approach, you can identify and fix the problem without guesswork. Start by checkingMMAchecking the water supply, sprinkler heads, and valves, then work through potential issues like leaks, design flaws, or regulator problems. With the right tools and steps, you can restore your systems pressure and keep your lawn healthy. Regular maintenance and timely repairs will prevent future issues, ensuring your sprinkler system delivers consistent, efficient watering for years to come. If the problem proves too complex, dont hesitate to call a professional to get your system back in top shape.